There are several options for the shapes of polycarbonate greenhouses, which can be installed in summer cottages. But the most successful option is a greenhouse with a gable roof, having the shape of a house. This article discusses the pros and cons of a greenhouse with a polycarbonate house, and also provides step-by-step instructions for its manufacture at home, from calculating the size and amount of material to the rules for installing a finished structure.
Pros and cons of greenhouses house
Recently, the most popular arched options for greenhouses, but designs in the form of a house are still considered the most suitable for growing crops.
Did you know? Prototypes of greenhouses inthe first appeared in ancient Rome. They were made in the form of carts with plants planted there, which were rolled out into the street during the day and moved into the house at night.
Despite the fact that the manufacturing process often requires significant material and labor costs, greenhouses have a number of advantages:
- the most rational use of the internal space of the structure - in it you can grow plants of any height;
- simplicity of arrangement of the ventilation system - you can cut two window leaves in the greenhouse that will ensure effective air circulation, but will not create a draft at the plant level;
- a gable roof contributes to the drainage of water during rain, preventing its stagnation;
- the roof is not subjected to excessive load during a snowy winter, because the snow above does not linger;
- the structure has high stability and is reliable;
- when building such a structure, there is no need to bend polycarbonate;
- the ability to control the degree of illumination of the space inside the greenhouse by changing the angle of inclination of the roof slopes to the ground.

In addition to the advantages, greenhouses have some disadvantages:
- long and laborious installation of the structure;
- additional material costs for the material for the manufacture of a stable foundation and frame;
- the need for cutting polycarbonate sheets.
How to make a polycarbonate greenhouse with your own hands: step by step instructions
To independently make a polycarbonate greenhouse, you need to make a lot of effort. The finished structure should be sustainable and provide plants with a comfortable microclimate for active growth.
Did you know? The first sheet of cellular polycarbonate was made in 1976 at Polygal in Israel.
In addition to choosing high-quality material for the construction of the structure, it is necessary to correctly carry out its drawings, choose a place for installing the greenhouse, calculate its dimensions and the amount of necessary materials, build a stable foundation and mount the frame. For the final stage of the construction of the greenhouse, the finished frame must be covered with polycarbonate.
Choosing the right place
Before you start building a greenhouse, you need to determine its location, given the landscape, the degree of illumination of the site and other factors. When choosing a place to install the structure, you must follow these recommendations:
- to place the building closer to the house or to make it adjacent to the wall of the house for the possibility of convenient installation of the heating system;
- Do not choose lowland areas, because there is a high probability of frost;
- you need to have a greenhouse on a site protected from strong cold winds;
- choose a place with dense sandy soil that does not hold water. If the soil on the site is clayey, you need to remove the upper fertile layer of the earth and lay a layer of gravel and sand under it, then return the removed layer of fertile soil to its place;
- the groundwater level should be at least 1.5 m from the surface of the earth;
- the axis of the greenhouse is placed in the direction from north to south, and the roof slopes are east and west, so that the inside of the structure is well lit by the sun, regardless of the time of year;
- if there are other objects on the site, they should be located on the north side of the structure so as not to obscure it and protect it from the cold wind;
- There should be a source of water for irrigation near the structure.
Size calculation
The production of a polycarbonate greenhouse begins with calculating its size and preparing a drawing. This will not only help to avoid mistakes in the construction of the structure, but also increase the efficiency of use of all materials.
Important! To minimize the amount of waste, the length and width of the greenhouse should be a multiple of the dimensions of a standard polycarbonate sheet - 2.1 × 6 m.
The main recommendations for calculating the size of the greenhouse in the form of a house are listed below:
- the width of the structure depends on the size of future beds and the width of the aisles between them. When growing compact and short plants, the width of the structure can be about 2 m, and for tall plants it is better to make it three-meter;
- the height of the doorway of the structure is determined arbitrarily and usually is at least 2 m. The internal space of the greenhouse will be a little higher in height due to the presence of a gable roof and a ridge;
- the height of the ridge is calculated by the formula H = 0.5 × L × tg A, where H is the height of the ridge, L is the width of the structure, A is the angle of inclination of the roof of the structure to the ground plane;
- the angle between the two slopes of the roof can be any, but you need to make it sharp to prevent the accumulation of water or snow and not increase the load on the structure;
- the length of the greenhouse is determined at will, but for the economical use of polycarbonate sheets, a structure of 6 m in length is most often erected;
- the distance between adjacent frames of the frame is recommended to be at least 1 m, so that the polycarbonate sheet is attached to the base in at least two places and does not sag under its weight or snow pressure.

Necessary materials and tools for work
For the construction of a homemade greenhouse, various types of foundations can be erected by the house and various types of frame can be constructed, onto which polycarbonate is then attached.
Important! It is not recommended to build too large greenhouses, that is, they require significant material costs for the purchase of materials and are more time-consuming to maintain.
List of basic materials used for the construction of the structure:
- wooden bars;
- metal profiles (painted and galvanized pipes);
- polycarbonate sheets;
- special profiles for fastening polycarbonate (end, detachable, connecting, etc.);
- brick;
- steel corners;
- screws and dowels;
- sand and cement;
- natural stone.

The list of tools for work:
- electric drill (with various types of nozzles);
- knife;
- roulette;
- building level;
- welding machine.
Foundation laying under the greenhouse
The success of building the entire greenhouse depends on the correct choice of material for the foundation. There are several possible options that differ from each other in the complexity of installation and durability.
Did you know? One of London’s most popular attractions is a greenhouse called the Crystal Palace, built in the 19th century.
Depending on the type of material used, the foundation for a polycarbonate greenhouse can be:
- Wooden (timber) - It is made of wooden beams and is the simplest version of the foundation, able to withstand a structure weighing up to 120 kg. For this option, steel corners are installed around the perimeter of the future design, to which wooden supports are attached. Then they are driven into the ground and wooden bars of the required length with a square section of 10 × 10 cm are attached to the perimeter around them. The life of such a foundation is no more than 5 years, after which the tree begins to deteriorate.

- Brick - consists of several rows of masonry laid on a small waterproofing pillow made of cement. Such a pillow protects the foundation from the negative effects of moisture contained in the soil. The number of rows of bricks depends on the size and weight of the future structure. The life of a structure with such a foundation is more than 50 years, but brick and cement have a high cost.

- Stone - consists of pieces of natural stone of various shapes, stacked on top of each other using a solution of clay and sand (in a ratio of 1: 1) for better heat conservation. If it has strong irregularities, then formwork is installed at the edges, which is poured with concrete. Such a foundation is particularly strong and durable, but working with a stone requires certain skills.

- Tape - It is made of cement mortar and is durable, but it does not require special skills or significant labor costs. To install it, a gravel cushion is laid around the perimeter of the future greenhouse, and then formwork is made of boards to a width of 30 cm and a depth of about 50 cm, into which cement mortar is poured.

Selection of material for the frame
The durability and stability of the finished structure directly depends on what type of material was chosen for the manufacture of the frame. When building a greenhouse at home for the construction of the frame, wood, metal pipes and a galvanized profile are most often used. Each of these materials has its own characteristics and installation method.
Wood
This material is environmentally friendly and most commonly used. For a wooden frame, bars with a square section are used, cut into individual parts according to the dimensions in the drawing. In this case, it is necessary to use a bar of section not less than 5 × 5 cm.
Important! Before manufacturing a wooden frame, the bars must be treated with antimicrobial agents.
To make a wooden frame for a homemade greenhouse of a house, you must perform the following actions:
- Using dowels, nail wooden boards at least 5 cm thick to the foundation.
- Attach vertical posts perpendicularly to the boards along the length of the greenhouse using self-tapping screws and metal corners. A step between fastenings - no more than 1 m
- For the stability of the frame, install slopes in the corners. To do this, attach a wooden block with one end to the aligned stand, and the second to the foundation. Mark with a pencil on the bar the line of the oblique saw cut and cut off the excess parts.
- Attach the slopes to the corners of the structure using self-tapping screws, referring to the indicators of the building level to determine the correct installation of the rack.
- Attach the connecting bars to the upper parts of the uprights using metal angles and screws.
- Fasten the horizontal ties between the upper parts of the vertical posts using metal corners and self-tapping screws.
- Support the screeds with slopes to improve the stability of the roof base.
- To make the roof, cut identical pieces of timber, the length of which is equal to the length of the roof slope. At the edges of the parts obtained, make oblique sections to connect the parts to each other.
- Separately, on the ground, assemble the triangular rafters of the roof of the greenhouse, consisting of a horizontal beam, on both sides of which are attached the parts that form the roof slope.
- The junction of the two bars forming the roof slopes should be perpendicular to the lower horizontal beam (the base of the triangle) using self-tapping screws.
- Install triangular rafters on the top of the structure and check for distortions using the building level.
- Connect all the top points of the installed triangular rafters with one long beam, forming a ridge of the roof.
- To strengthen the strength of the roof, perform the crate - install wooden blocks on the slopes, placing them with a step of 40 cm parallel to the floor plane.
- At the ends of the structure, install the bars forming the doors and windows, fixing them with metal corners and self-tapping screws.
- Separately make a door and a window leaf of a suitable size and fasten them in appropriate places using hinges. The wooden frame is ready.

Profiled pipes and steel angle
The frame of the structure can be made of a profile pipe 4 × 2 cm in size and a steel corner 4 × 4 cm in size. All parts are connected together using a welding machine; at the same time, a steel corner is used for the lower and upper parts of the frame and the ridge of the roof, and for the side racks and slopes - a profile pipe. The distance between the uprights should be 0.5 m. This design has a large weight, but is highly stable.
Did you know? The first real greenhouses began to be built in XIII century in Germany. They were greenhouses for growing exotic plants and were built exclusively in rich mansions and palaces.
Step-by-step instructions for the manufacture of such a frame for the greenhouse of a house:
- Cut from the metal corner 4 identical blanks equal to the width and length of the future greenhouse.
- Weld from the prepared parts 2 identical frames (upper and lower). Pre-cut the joints of the workpieces at an angle of 45 ° so that they can be welded at right angles.
- Cut the required number of identical pieces from the profile pipe, the length of which is equal to the length of the roof slope. For each pair of parts, prepare a piece of the profile pipe equal to the width of the greenhouse.
- Weld triangular blanks for the roof from prepared parts so that between the segments forming the slopes, a right angle is obtained.
- Weld a reinforcing metal jumper in the middle of the height of each triangle parallel to its base.
- Weld the resulting triangles to the upper frame, placing them with an interval of 0.5 m.
- Connect the vertices of all welded triangles with a piece of metal corner, the length of which is equal to the length of the greenhouse. Weld the corner to the triangles.
- Cut pieces of the same size from the profile pipe for the side posts. The number of such parts should be 2 times the number of previously made triangles.
- Weld the vertical posts perpendicular to the lower frame so that their location coincides fully with the location of the triangles on the roof.
- Weld the upper frame with triangles to the upper parts of the vertical racks of the lower frame so that the location of the racks clearly coincides with the location of the triangles. Firmly weld all corners of the frame.
- Cut pieces of the profile pipe for the doorway and window leaf.
- To the end triangle, weld a rectangular frame for the window. According to its size, make a window leaf, welding together the details in the form of a rectangle. Attach the window to the frame using awnings.
- Cut the parts for the frame of the doorway from the profile pipe and weld them in the form of a rectangle on the end side of the frame.
- Similarly, make a door from suitable pieces of pipe and fasten it to the frame with hinges. The frame for the greenhouse is ready.

Galvanized profiles
The galvanized profile greenhouse frame is durable and resistant, and its construction is quite simple and does not require special skills. This material is quite cheap, does not corrode, and the finished design is quite lightweight, which allows you to transfer it to another place if necessary.
Step-by-step instructions for erecting a greenhouse frame with a house made of galvanized profile:
- Prepare 2 pieces of profile, the length of which is equal to the height and width of the greenhouse.
- Insert these parts into each other to make a rectangle, and fasten them with screws (2 pcs. For each corner).
- Cut a piece of galvanized profile, the length of which is equal to twice the length of one roof slope. Mark the middle on it and make an incision - you get a bent blank for a gable roof.
- Attach it to the previously made rectangle using self-tapping screws - you get the back wall of the structure. If necessary, it can be strengthened with additional stiffening ribs.
- The front wall of the greenhouse is assembled in a similar way, but in it an additional trim for the doors is laid out.
- Install the ends of the structure vertically on the foundation and fix them with self-tapping screws.
- Cut identical pieces of profile with a length that is equal to the height of the greenhouse. Attach them perpendicular to the foundation at a distance of 1 m from each other.
- Connect the vertical side racks with a horizontal profile using self-tapping screws, controlling their evenness.
- Make bent blanks for a two-sided roof slope as described above. Their number should be 2 times less than the number of uprights.
- Fix bent blanks on horizontal profiles parallel to each other using self-tapping screws so that they coincide with the tops of the side posts.
- If necessary, install additional stiffening ribs between the posts, placing them diagonally from one corner to another. The galvanized profile frame is ready.

How to cover a greenhouse with polycarbonate in a corner house
Polycarbonate is one of the most popular coating options for greenhouses, because it perfectly transmits light and creates a suitable microclimate indoors; Moreover, unlike glass, it is not so fragile. It can be fixed on the walls of a metal frame using self-tapping screws, and special profiles are used to mount the shelter on the roof slopes.
Important! To cover the greenhouse with a house, it is recommended to use polycarbonate with a thickness of at least 4 mm so that it does not deform under the influence of wind or snow.
The main subtleties of using polycarbonate for sheltering a greenhouse:
- polycarbonate sheets need to be arranged so that the honeycombs are in a vertical position - this will contribute to the removal of moisture;
- for the point fixing of the material to the frame, special self-tapping screws with thermal washers are used that protect the polycarbonate from deformation;
- screws should be screwed strictly perpendicular to the frame so that it does not damage the surface of the material;
- the depth of screwing of the self-tapping screw should be such that its cap only slightly touches the surface of the polycarbonate and in no way presses it, i.e. this will damage the top layer of the material and break the tightness;
- polycarbonate expands in the heat and narrows under the influence of low temperatures, so when covering the greenhouse you can not stretch the material too much. It is better to arrange it more freely and fix the sheet so that it can deform in width by 2-3 mm;
- the outer side of the polycarbonate, equipped with special UV protection, must be outside the structure;
- for linear connection of polycarbonate sheets during roof sheathing, special detachable connecting profiles are used, consisting of a base (attached to the frame) and a cover;
- For covering the pitched roof with polycarbonate, a special ridge connecting detachable profile is used, consisting of a base and a top cover;
- To protect the places where the sheet is cut from dust and insects, end profiles (solid and perforated) are used;
- For fixing polycarbonate to corners, a special corner profile is used.
 Step-by-step instructions for covering the frame of a greenhouse from a metal corner with polycarbonate:
- Using a sharp knife, perform cutting of polycarbonate sheets, respectively, with the dimensions of the greenhouse, as well as the dimensions of the door and window leaf.
- Install a solid end profile on the upper cut of the sheet, and perforated on the lower cut (to allow condensate to be removed).
- At the ends of the frame, the material is point-mounted using self-tapping screws with thermal washers. In metal racks, holes are drilled in advance at a distance of 30–40 cm from each other.
- Drill holes in the polycarbonate sheet, leaving a distance of 30–40 cm between them. The diameter of the hole obtained should be 2-3 mm larger than the diameter of the self-tapping screw.
- Fix the sheet on the vertical posts of the ends of the structure using self-tapping screws with thermowells inserted into the holes drilled in advance.
- To shelter the roof slopes, drill holes in the rafters at a distance of 30–40 cm from each other. Their diameter should be 2-3 mm larger than the diameter of the self-tapping screw.
- Screw the base of the detachable connecting profile to the frame and install on both sides of it two sheets of polycarbonate, leaving a gap of 3-5 mm between them. Cover the base with the top cover and press it lightly until it clicks.
- Sheathe the entire roof of the greenhouse in this way. Then set the corner and ridge profile.
- Similarly, attach polycarbonate sheets to the side walls of the greenhouse using detachable connecting profiles.
Important! Critical polycarbonate sheet layout - 6°. At a lower rate, condensation will accumulate inside the material.
Overview of greenhouses industrial production house
If it is not possible to independently build a greenhouse with a house, you can purchase a finished structure containing a collapsible frame. Manufacturers offer models of various lengths, consisting of prepared parts that just need to be connected using fasteners.
The most popular models of gable greenhouses for industrial production include:
- "House". The width of the structure is 3 m, the height is 2.1 m. On top of the greenhouse is covered with polycarbonate having a thickness of 4 mm. The reinforced frame is made of a metal profile with a cross section of 20 × 20 mm and coated with powder paint. The design has 2 doors and 2 windows.

- "Delta". The width is 2.5 m and the height is 2.2 m. This design is mounted on the ground using T-shaped parts. The roof slides to the side for ventilation and can be easily cleaned for the winter. The skeleton is made of galvanized pipes with a section of 2 × 2 cm.
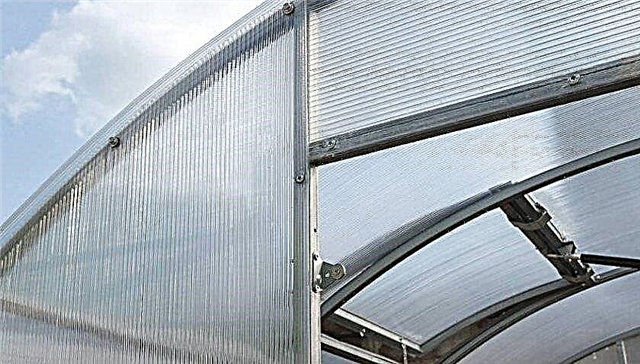
- “Siberian - Reliable Comfort”. The width of the structure is 2.5 m, the height is 2.5 m. Its frame is made of a square metal profile with a section of 2 × 2 cm, the thickness of the metal is 1.5 mm. In the greenhouse there are 2 doors and 2 windows.

- “Glory Lux”. The structure has a width of 2.8 m and a height of 2.2 m. The reinforced frame of the structure is made of galvanized pipe with a section of 2 × 2 cm. This model has a removable roof, and is also equipped with two windows and doors located on opposite ends of the structure.

- "Viburnum". The manufacturer of this model is the Glass House company (Azerbaijan). The width of the greenhouse is 2.5 m and the height is 1.9 m. The frame is made of square galvanized steel profile with a cross section of 2.5 × 2.5 cm. Polycarbonate 4 mm thick is used as a coating. A feature of this design is the presence of sliding doors and compact dimensions.

Using the step-by-step instructions for making various types of greenhouses with a house listed above, you can independently create a beautiful and durable structure that will not only allow you to grow plants in it, but will also become a decorative decoration for your summer cottage.


